
Type of Contents
Introduction
This document will provide high-level overview of the overall branding process request after ANTX board replacement.
Branding Pack Installation after Anthem I/O (ANTX) Board Replacement
New fuel dispensers featuring the Anthem UX platform arrive from the factory with the customer’s branding already installed. Replacement ANTX boards require that branding be loaded after completing the procedure in the Anthem UX platform startup manual (P/N WU020355).
Perform the following steps to request download of the branding package.
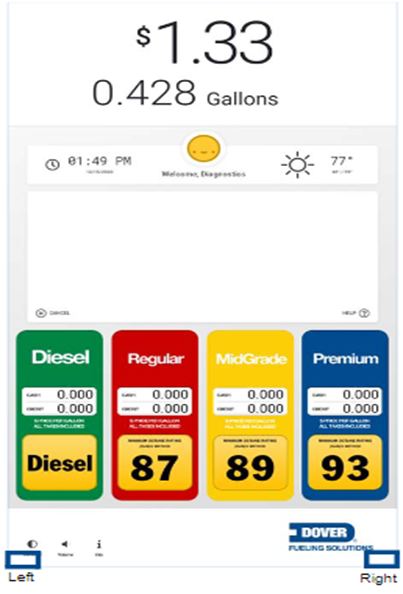
1. Idle out a working FP with the correct branding (Take a reference picture)
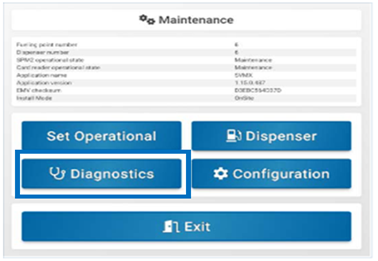
2. Access the Maintenance menu via touch screen (Left/Right/Left) (See Area Above)
3. Select Configuration
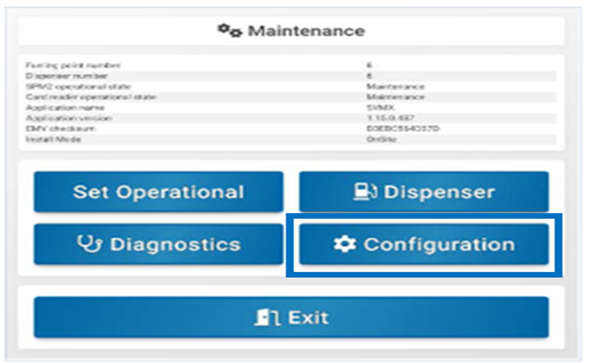
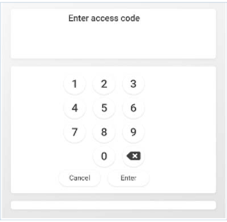
4. Enter Access Code
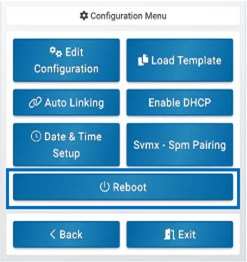
4. Reboot the Idle working Anthem in the “Configuration Menu” by selecting Reboot
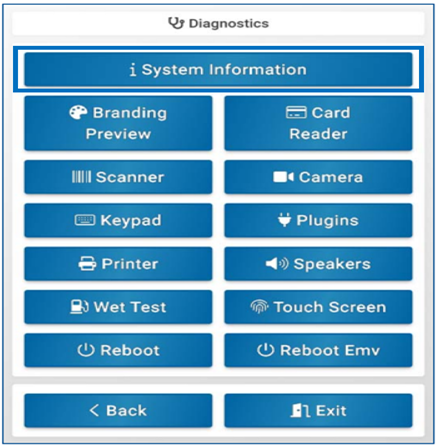
5. After reboot of the dispenser, re-enter Maintenance menu and select the “Diagnostics”
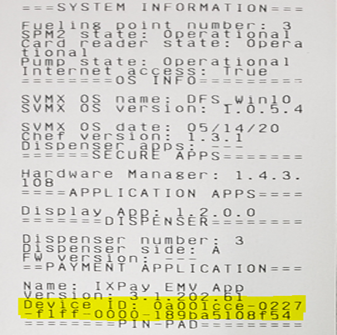
6. Select “I System Information”
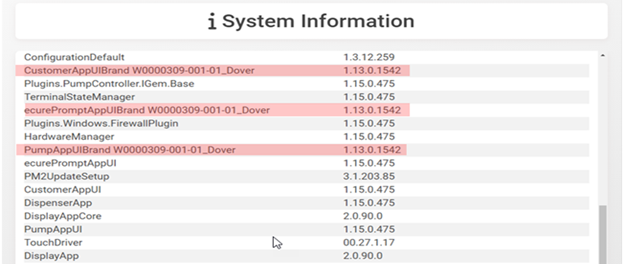
7. Take a clear picture of the “I System Information” screen which includes the “ConfigurationDefault”, “CustomerAppUIBrand Wxxxxxxx-xxx-xx”, “SecurePromotAppUIBrand Wxxxxxxx-xxx-xx” etc
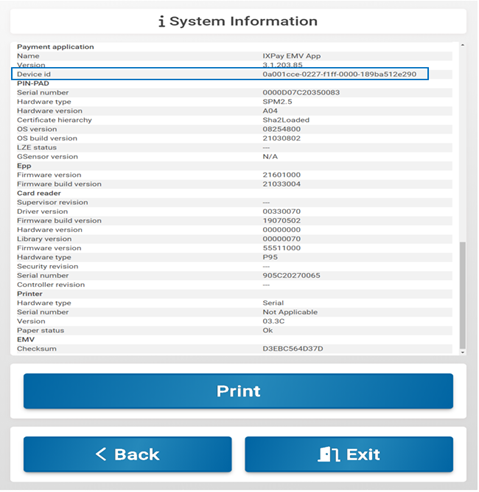
8. Take a clear picture of the dispenser Device ID from the UI or printed System receipt
9. Navigate to the Global Support Website at https://dfsdx.zendesk.com/hc/en-us and click Submit a request using either the link at the top-right of the page or the lower-right tile
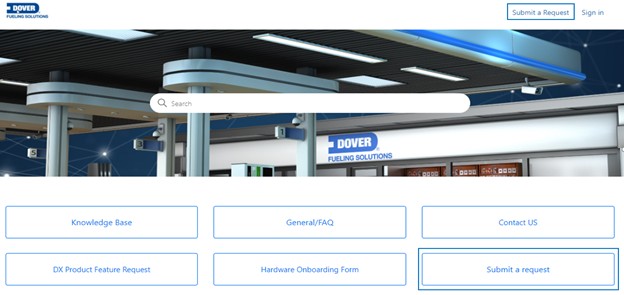
10. Complete request form to include Site Name, Site Address, Fueling Point # and Branding Type
Be sure that the following web form options are selected
- Type of Request = ASO Service Request
- DFS Solutions = DX Anthem Dispenser
- Issue Symptoms = Anthem Board Replacement/Branding Request
- DFS Hardware = Anthem Board
11. Click Add file to attach the all saved images and add any special notes, if applicable
12. Click Submit to send the request to DX Global Support
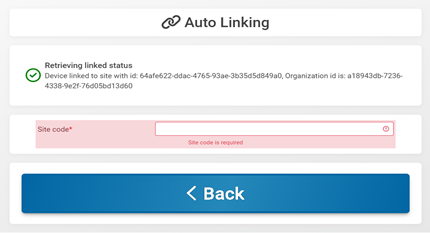
13. The Global Support agent will respond with the Site Code needed for Auto-Linking configuration
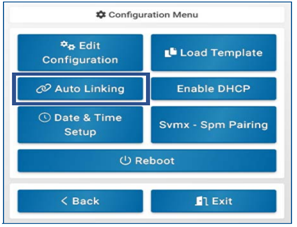
14. Next access the dispenser Maintenance Menu then Configuration Menu and select Auto Linking
15. Enter the Site Code provided in the email in the Site code field Save and Exit
16. A email reply showing auto-linked FP online will be received & branding pack will be sent to FP
17. The remotely sent branding pack will install and the FP will reboot
18. “Out Of Service 0.0” will be displayed on Idle screen
19. Access the Maintenance Menu and Reconfigure the dispensers fuel product(s) & grade(s)
20. A DCR download or reboot may be needed for Idle prompts, branding, and media if applicable
21. Visually validate that the branding matches the other like fueling points
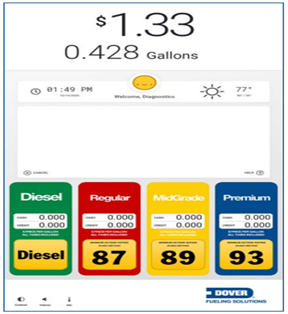
22. Take a branding validation picture of the Idle screen (See example below)
23. Run a test transaction to validate fueling and media (if applicable)
24. Reply with the validation image attached & note the test transaction was completed successfully
25. The DX Global Support team will reply that the request is complete & release the technician
Comments
0 comments
Please sign in to leave a comment.